CARE AND MAINTENANCE
Phase One Landscapes, Inc.
The Phase One Landscapes Care Guide
Here at Phase One Landscapes, we design spaces that are extremely sustainable. That being said, we want you to make the most of your investment. We have created a care guide that should assist you in properly maintaining your property and helping your landscape thrive. Browse through some of our expert advice below, and
contact us
today if you wish to begin a new project.
-
General Info on Landscape and Sod Care
Goal
Days 1-7
To keep the sod really moist. Due to soggy conditions keeping off the turf is important.
Days 7-14
Begin a gradual reduction in the amount of irrigation. Conditions will remain fairly moist, so stay off the turf as much as possible
Days 14-21
Maintaining more of a gradual reduction in the amount of irrigation. The first mowing can usually be done at the end of this week.
Days Normal
Getting the sod on a normal schedule. Your turf will require approx. 1.5″ of water per week.
4" Pop up spray heads
Days 1-7
3 times per day (morning, noon, night) 10 minutes per zone
Days 7-14
2 times per day (noon and night) 15 minutes per zone
Days 14-21
1 time per day (in the evening) 15 minutes per zone
Days Normal
3 days per week 1 time per day 15 minutes per zone
Large radius rotors
Days 1-7
3 times per day 30 minutes per zone
Days 7-14
2 times per day 30 minutes per zone
Days 14-21
1 time per day 30-45 minutes per zone
Days Normal
3 days per week 30-45 minutes per zone
12″ pop-up sprays
Days 1-7
1 time per day 20 minutes per zone
Days 7-14
3-4 times per week 20 minutes per zone
Days 14-21
3 times per week 15 minutes per zone
Days Normal
2-3 times per week 15 minutes per zone
Drip
Days 1-7
30 min 1 time per day
Days 7-14
30 min 3 times per week
Days 14-21
30 min 3 times per week
Days Normal
30 to 45 min 2-3 times per week
Important Aspects to Note:
During very hot weather all new plants will need special attention. Initially, trees, shrubs, and perennials may need hand watering to maintain moisture levels close to the soil surface. This will also help to reduce soil temperatures and plant transpiration giving new plantings a better chance. Areas watered with drip systems especially might need hand watering. All of your new plants should be inspected for wilting and other stress every day for the two weeks. Beyond the second week, overwatering becomes a concern. If you have questions please call our office.
Some of your plants may exhibit transplant shock after they are initially planted. Plants need several months to a year to establish themselves. Signs of shock include leaf drop and wilting. Trees especially may drop their leaves, but if new buds are present on the twigs, they will usually survive and become healthy the following year. Keep an eye on your plants and remember that over-watering plants can kill them just as quickly as not watering them at all. Keep lawn mowers and weed whackers away from tree trunks.
Damage to the bark on tree trunks will scar the trunk and may lead to the tree's death either through disease or starvation. If a tree is planted on your lawn, consider having a ring of mulch around the base to best protect your trees. Most often, new trees are installed with T-posts and guying wire to give extra support during their establishment period. T-posts should be removed 1-2 years after your tree has been planted. Phase One Landscapes can provide this service call if requested.
How to Keep Your Garden Growing
So now you own a custom outdoor space. You’ve helped with all the details and discussed the flowers, shrubs, and trees. What do you do now? Like anything of value, custom landscaping needs care and maintenance. So in order to keep every part of your landscape healthy, you’ll need to come up with a care plan. We have tried to provide plenty of solutions and tips in the Care Guide for two of the three types of gardeners:
The “Garden Enthusiast” – those who are avid “do-it-yourselves” tackling all projects large and small, and The “Practical Gardener” – those who enjoy being outdoors maintaining the beauty of the garden, but call in help with the bigger projects.
Those that are “Garden Lovers” – who don’t want to contemplate the nutrient needs or lawn care requirements of their landscape, just call our office, and if we can’t provide the service we can refer someone who can.
-
Lawn Care
The first few months are a vital period in establishing a strong, healthy lawn that will have your neighbors green with envy. Sufficient moisture is the most essential element in promoting good root growth early and preventing newly laid sod from drying out. Newly transplanted plant material in general needs to be closely monitored to help get through the shock of transplanting.
Your irrigation clock will be programmed to ensure that your new lawn will receive the proper amount of moisture through the establishment period. The schedule in this Care Guide should serve as a model for the first few weeks. Keep in mind that weather changes will require that you adjust the schedule. Other factors which affect water requirements are sandy or clay soils, steep slopes, and sun exposure.
The initial and established clock programming may need to be modified based on weather changes such as rain, or wind, and other factors such as sandy or clay soils, steep slopes, and sun exposure. If you notice an area is looking stressed, increase the water time and/or the frequency of the zone. That area will respond within a week to 10 days.
The First Mow
After your new lawn is installed, wait until the grass is growing vigorously, at about 3 weeks, before mowing for the first time. Check that sod has been rooted by tugging gently on a corner. You should feel resistance. The watering schedule will have been reduced, but make sure that the soil is dry enough to avoid ruts and tracks which are difficult and costly to repair.
The first few times you mow run the mower perpendicular to the direction the sod strips were installed. Set the lawn mower wheels at 3″ or higher to prevent cutting the grass too low. This is especially important during the hot, dry months of summer. After 3 weeks the lawn can take light traffic but avoid heavy traffic until the lawn is a little more established – usually about 6 weeks.
Mowing Advice
A healthy lawn provides you with a relaxing place to throw a blanket, enjoy a book, or wrestle with the kids. Proper mowing is necessary to maintain a sturdy stand of bluegrass. Avoid mowing when the lawn is wet, and make sure your mower blades are sharp. Sharpening your blades annually is recommended as a dull blade will tear the grass blades leaving a jagged edge that will turn the ends of the grass brown.
During the season change your mowing direction every now and then. This will help the blades to stand upright – sometimes turf grass will be conditioned to lean when always mowed in the same direction. Never mow less than a 2″ height as turf grass cut too short will not tolerate drought conditions, become weak rooted, and susceptible to insects, weeds, and diseases.
Feeding Your Lawn
All living plants need a supply of nutrients and water from the soil. Cultural practices such as mowing, especially if not using a mulching mower, will drain the food reserves stored in the grass. It’s a good idea to feed your lawn three to four times a year – in the spring, midsummer, and early fall. Your local garden center and labels on the fertilizer will recommend which blends of fertilizer are best for each season. A fertilizer that includes a broadleaf herbicide applied in the spring will help control weeds.
In general, the primary nutrients needed by your lawn, and included in fertilizers are nitrogen, phosphorous, and potassium. Nitrogen will promote thick vigorous growth, and is responsible for a rich green color. Avoid excessive applications as too much nitrogen will cause excessive growth, increasing its water and mowing requirements. Deficient levels of nitrogen will cause leaves to turn light green, then yellow.
Phosphorous provides the mechanism for using and transforming energy. It encourages healthy roots and tends to remain in the soil for longer periods. It is often not necessary to apply the same application rate as often as nitrogen through the season. Most fertilizer blends for summer and fall will have a lower percentage of this nutrient than spring blends. Deficient levels of phosphorous cause a reduction in moisture retention, and leaves become narrow and curl.
Potassium helps with root growth, hardiness, and disease resistance. Adequate levels will make your lawn more resistant to heat, cold, and frost conditions. Deficiencies in potassium are first indicated by drooping leaves, which will feel soft to the touch.
The Dreaded Weed (Prevention Tips)
Your lawn is already an excellent barrier to the establishment of weeds, but sooner or later your neighbors’ dandelions will make their contribution. The best defense against weeds is a thick healthy lawn. Keeping it healthy will go a long way towards keeping it weed-free. Phase One Landscapes has provided the following maintenance concepts which help to prevent weeds from gaining a foothold.
1. Mow the grass to the proper height of 3″ in the summer. Mowing too closely weakens the grass allowing weeds to compete more effectively
2. Aerate your lawn in the Spring and Fall to improve growing conditions. Aerating provides more oxygen to your soil which in turn gives your lawn the vitalization necessary to fight weeds. Apply fertilizer to your lawn after aerating. Power raking is not usually recommended, especially if the aeration schedule is maintained.
3. Rake or vacuum leaves in the fall. Remove all leaves from your lawn surface in the fall, you can mow and bag the leaves, but don’t mulch into the turf.
4. Wetting agents such as Revive will improve the soil's ability to absorb moisture.
Options for Weed Control
1. Applying an herbicide to spot and treat isolated weeds rather than the whole lawn. You can find ready-to-use sprays, wax, impregnated sponge sticks, or non-chemical methods at any nursery or garden center.
2. Manually remove the weed before they produce seeds, and by taking as much of the root as possible. Even consistent removal of the top growth will weaken the weed.
3. Treating the entire lawn with a particular kind of weed killer, one that affects the weeds but does not harm the lawn, usually termed a broadleaf post-emergent herbicide. Read product instruction labels carefully for application rates.
4. If weeds predominate, repeat treatments are needed, 2 to 3 times during the summer, at 4 to 6-week intervals.
Extreme Weather
High temperatures, intense sun, and lack of moisture are associated with both periods of drought, and our midsummer months of July and August will have effects on your bluegrass lawn. Bluegrass is actually pretty resilient to drought conditions as in extreme conditions it will usually turn brown and go dormant in the effort to stay alive.When cooler temperatures and natural precipitation return the grass will come out of dormancy and get green again.
In July and August, we recommend increasing the run times of your lawn 4″ popup zones from 15 minutes to 20 or 25 minutes, and the rotor zones from 30 minutes to 45 minutes to keep the lawn as green as possible. Dry areas in the lawn are common in these months unless there is increased irrigation water added.
For those who are OK with a few dry areas for a month or so, keep the zones on the normal run times, and your lawn will come back in September. Please keep in mind any watering restrictions that are in effect for your area. Remember a little water goes a long way for the long-term ability of the lawn to get back to green after the hot months or the drought period is over.
Persistent Rain
As with other plants, too much water can be as damaging as too little. Wet, soggy lawn areas are susceptible to damage from mowers and foot traffic, as well as certain fungal diseases. Turn your irrigation clock from auto to “off” or “rain”, and let the natural precipitation do the work on rainy days or during wet periods. This helps with water conservation and improves the health of your lawn.
Remember to turn the clock back on when the sun returns – some clocks have a rain delay program that allows you to postpone regular watering without shutting off the system.
Winter Season
Bluegrass is dormant in the Denver area from about Thanksgiving to Easter, and during this period it is important to have all leaves removed to avoid areas that maintain moist conditions. This contributes to a fungus called snow mold which shows up as small circular patches of dead and matted grass in the spring. If the lawn can dry between the snows, this will not be a problem.
Once again – too dry can cause problems, and during long, 3 to 4-week periods of low winter moisture areas of your lawn – especially west or south-facing slopes will need hand watering. This will avoid winter desiccation of the roots, and keep the grass dormant until spring.
-
Tree and Shrub Care
How to Protect Your Investment
Trees add aesthetic value to your property, as well as provide shade and privacy for your home and outdoor living spaces. Trees make a property more valuable; realtors know that homes with well-kept lawns, well-maintained trees, and pleasing ornamental plants sell more quickly and for more money than those not landscaped. Pruning which preserves the integrity of a landscape and the health and vigor of plants is an important way to protect your investment.
Phase One Landscapes has compiled the necessary information to assist you in the proper care needed to grow beautiful, healthy trees and shrubs.
Watering and Fertilizing Trees and Shrubs
Some plants may require a year or two before they can be considered established. Planting during our hot dry weather requires paying closer attention to plant needs. Frequent light watering with a hose will help to reduce transpiration and will aid in reducing soil temperatures. Deep watering should be done carefully at this point to help reduce the chance of overwatering. If the plant is too wet, pull back the mulch at the base to allow the soil to dry out.
Once established, frequent shallow watering should be avoided as it may encourage the roots to grow too close to the surface. During the winter one of the best things you can do for your plants is to water them when the weather is warm (45 degrees or warmer) and dry. Keep in mind that the water needs to penetrate the soil before it freezes to avoid damage. This is true of all plants, especially trees and shrubs. In spring, you will know that your trees are doing fine if they put out sturdy new growth with good-sized healthy leaves.
If that’s the case, you can simply let them be, seeking their nutrients from the native soil and appreciating regular watering, some added nutrients, and having their roots insulated by the mulch around them.
Miracle Grow and Miracid can be applied 1-2 times per year with a sprayer or mixed and poured at the root zone for extra nutrition. If you want to pamper a tree, keep up with the mulching schedule. Trees should have 2-3 inches of mulch around the trunk – deep enough to conserve water yet still allowing oxygen to get to the root system. Mulch helps to keep moisture in the soil and helps to keep soil temperature cooler during hot summer months.
Watering Shrubs
Although many shrubs we specify are drought resistant, during the first year of establishment, they require regular watering, particularly during the warmer months of summer. In subsequent years, it is a good idea during prolonged summer to water to a depth of 1 1/2 feet at least once a week.
Although most shrubs will survive and even thrive without an annual feeding, for best results, each spring before growth commences, work about one cup of all-purpose 5-10-5 fertilizer into the soil around the plant. It is not necessary to dead-head (remove spent blossoms from) shrubs.
Why and When to Prune
Pruning is essential in preserving the integrity and scale of your landscape design. Regular and correct pruning keeps shrubs and trees healthy and vigorous and prevents potential problems. Properly pruned flowering shrubs not only blossom profusely year after year but also remain a desirable size. In addition, should you start pruning and training early on you will prevent the need for major pruning later.
Wait at least a year after planting a tree before you start to prune it up. Always start by removing dead or diseased branches first. Diseased branches should be cut 6-12 inches below the diseased area. Next, remove branches that are too low on the trunk. Prune the lowest branches in stages. In late winter or early spring, cut back the lowest branches by about one-third to side branches, leaving no stubs. The following winter or early spring, remove those lowest branches entirely and cut back the higher branches by one-third, and so on, year by year until the trunk is clear to the desired height.
After pruning up, your tree may need pruning in the future only to remove dead or broken branches. To allow the tree to take its natural form (usually the most beautiful), prune only when necessary.
Thinning a tree simply means removing branches, and cutting them back either to side branches or to the trunk. Thinning results in trees and shrubs that grow at a healthy pace, attain the most natural appearance and strong growth and will remain neater and require less pruning over time. Never shear trees or shrubs unless you have hedge-type shrubs that can handle shearing such as boxwoods or privets.
In nature, plants gradually self-prune by shedding dead branches at the point of attachment to another branch or trunk. Learn from this example as it is a good guide for your pruning. The pruned end cut should angle with the remaining branch or twig, and be 1/8″ to ¼” long. Do not wait for a tree to outgrow its space; the pruning needs to start when the tree is approaching the size you’d like it to stay. There are many reasons to hire a professional for pruning chores.
Unfortunately, most of us don’t have a clear sense of how a particular tree will grow if we cut it here or there, and once you begin to cut, the changes are permanent. You may not have enough time or the proper tools for major pruning jobs. Tree pruning can be dangerous and often should be left to a professional, who has the expertise, equipment, and insurance coverage
Repairing Storm Damage
Snowstorms, heavy winds, and thunderstorms can damage even properly pruned trees and shrubs. When severe weather causes limbs to snap, the damage can often be repaired and the tree saved with the proper techniques.
When the weather breaks or damages branches high in a tree, there is little recourse other than to seek professional tree-care help. These branches are often hazardous to remove and may require roping to lower them safely to the ground.
Remove the broken branches by cutting them all the way back to a secondary branch or to the trunk. After pruning a severely damaged tree, increase its vigor by giving the tree extra care. Consider a little extra water and fertilizing, mulching, and regular pest control to help the tree recover.
Avoiding Pests and Disease
A simple way to have a healthy garden involves keeping your plant beds and borders weed-free, using clean tools when gardening, and removing pests and diseased leaves immediately upon notice. Some wildlife can actually discourage pests and disease; centipedes feed on many soil pests, ladybugs and their larvae feed on pests such as aphids, while spiders trap a range of pests in their webs. If your plants show signs of discoloration or the leaves have holes in them this can be a sign that insects are damaging them.
Insecticidal soaps are an organic approach, and other pesticides are available at garden centers. Most pests and diseases can be controlled through a spaying regimen by tree care companies. If you need a tree doctor, recognize a problem, or just want to give your trees their best chance, call us and we can recommend a few professional tree care companies.
-
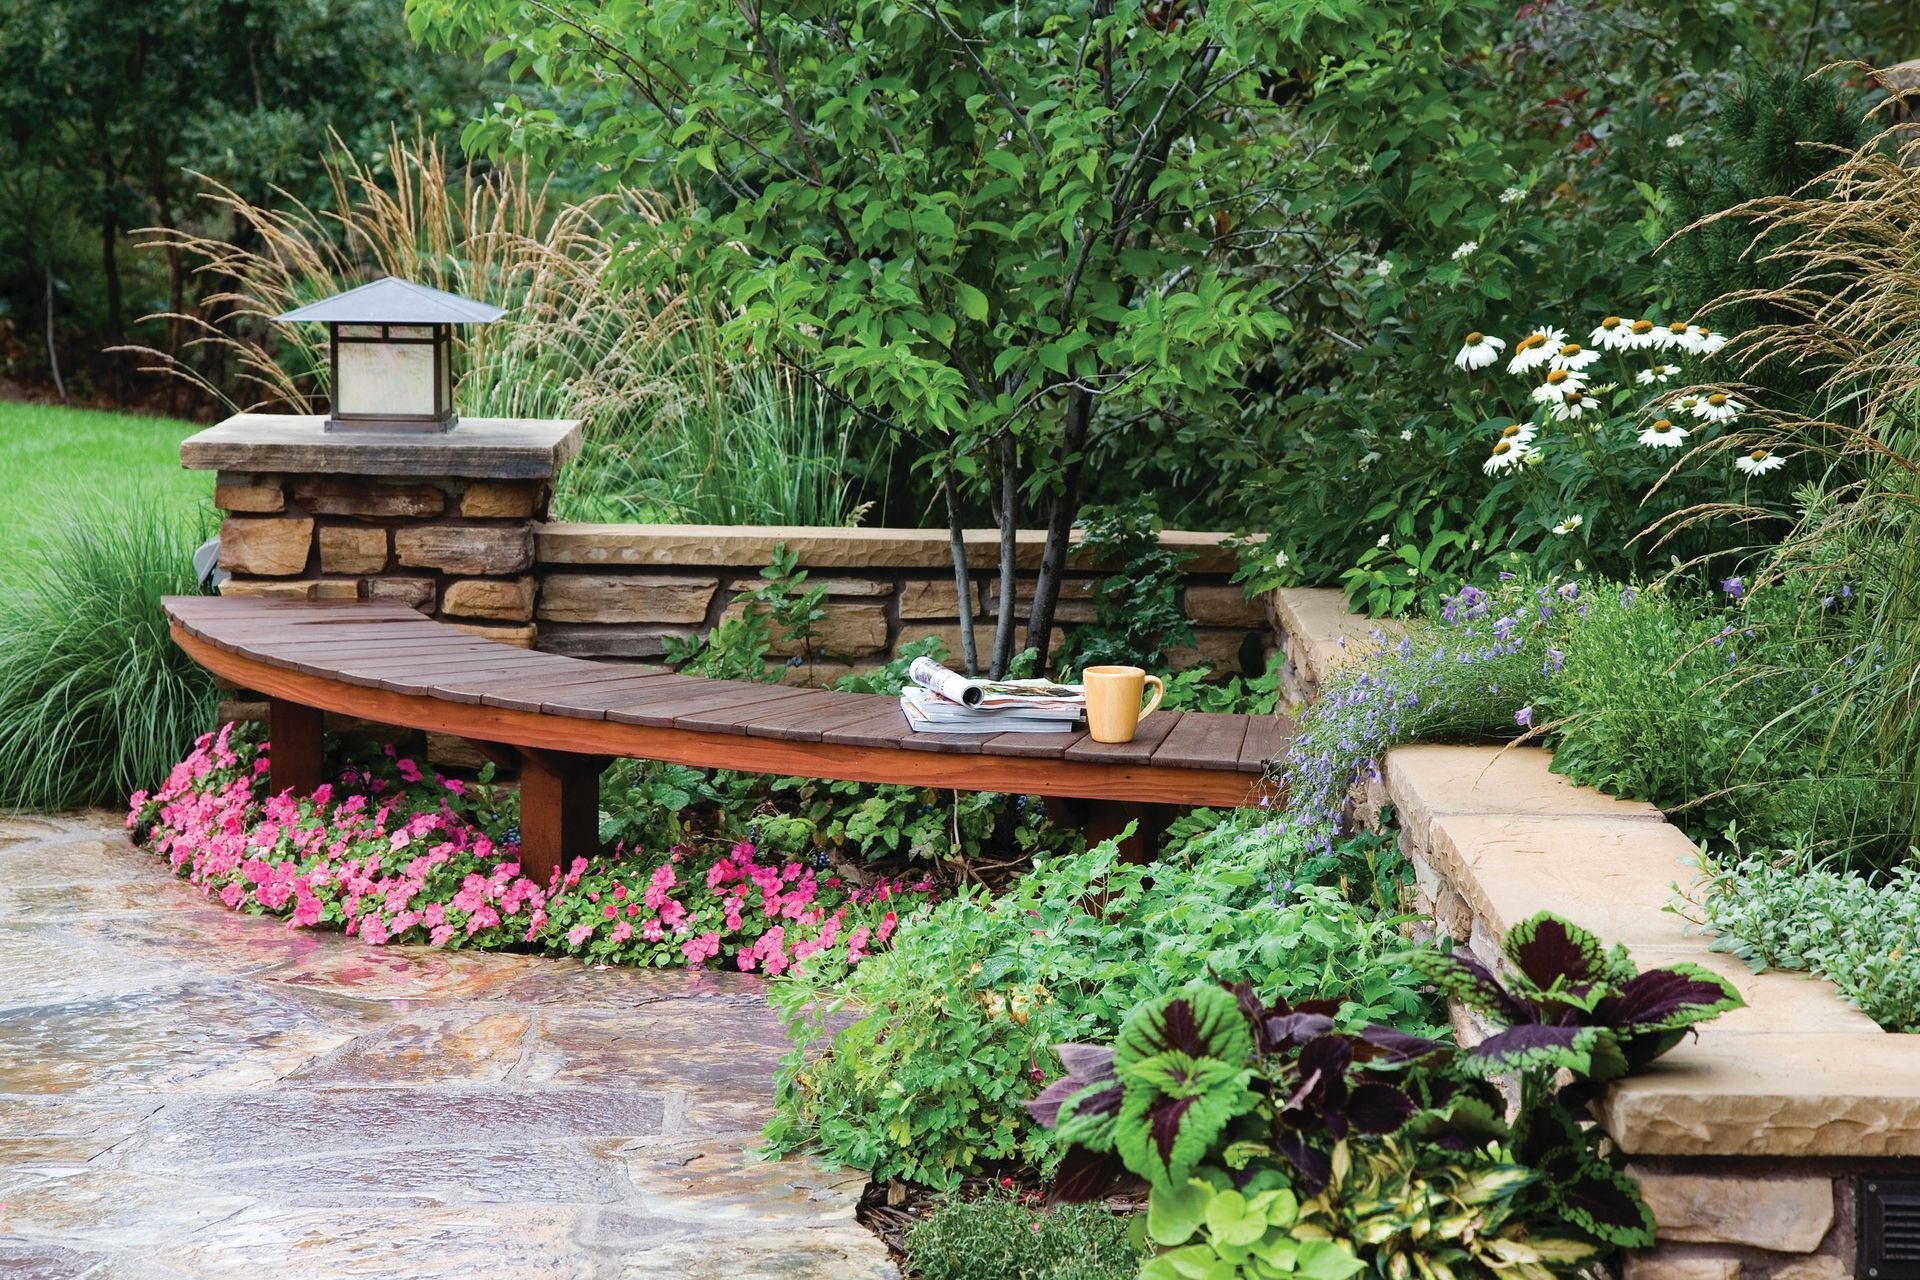
Perennial and Ground Cover Care
Garden tasks need not be a burden and can even be enjoyable. They give you the chance to appreciate your plants at close quarters and the pleasure of seeing your flowers re-emerge, flower, and fade during every season of the year.
If you find time regularly to take a stroll around your garden or patio inspecting your plants, you will be able to nip all sorts of problems in the bud immediately and help your plants look their best. Uprooting weeds as they emerge is not only easier than removing them when they are large, but it also means less disturbance to your plant’s roots.
Initial Care for Your New Plant Beds
Your plants were watered when initially planted, and they should not need to be watered on a regular schedule like the sod. Over-watering your perennials will make the root area too wet keeping oxygen and nutrients from entering the root system and essentially drown the plant.
Some of your plants may exhibit transplant shock after they are initially planted. Plants need several months to a year to establish themselves. Signs of shock might include leaf drops and wilting. Keep an eye on your plants and remember that over-watering plants affect their health just as quickly as not watering them at all.
From installation on, plant beds with drip irrigation can be watered 2-3 times per week, once per day, for 30-40 minutes. Plant beds with 12″ popup sprays should be watered 2-3 times per week, for 20-25 minutes. This schedule is for perennial and shrub beds if you have areas where you would like to plant annuals unless, in the original design and installation, modifications to your irrigation system will have to be made. Annuals in planting beds require as much or more water than lawn areas and often spray heads can be added to a nearby sod zone.
If your perennials look stressed, check to make sure that they are not too wet. Test the soil down 2-3″ into the ground away from the stems. If the soil seems too wet cut back on watering and possibly pull back the mulch from the area. If the soil seems overly dry, check the drip system to ensure that it is watering properly for each plant.
Watering, Feeding, and Mulching
Young plants must have plenty of moisture until they are well established. Most established perennials will need little watering, many positively thrive in dry soil but use good judgment. The need for watering will also depend greatly on weather conditions.
To achieve the maximum benefit, irrigate in the early evening or early morning when the water will evaporate less quickly, and direct the water down to the roots. Remember- do not overwater your plants as they do not like “wet feet”.
The best thing you can do for your plants in the winter is to water them when the weather is warmer and dry- approximately once per month.
Proper fertilizing, especially when plants are young, is very important to the quality of blooms. Even though young transplants may not be blooming much, their growth during the first 6 to 8 weeks after planting has a huge impact on how well they bloom later. Proper fertilization also helps perennials bloom as long as possible.
Before adding plants to your landscape, we amended your soil with a compost mix so your plants will have enough nutrients for healthy growth. Nitrogen is responsible for the green color of plant leaves and should older leaves show yellowing it can be a sign of nitrogen deficiency.
Note that plants also need phosphorus and potassium for overall total plant health. Phase One Landscapes suggests you use any kind of fertilizer that shows a nice balance of the three major plant nutrients: nitrogen, phosphorus, and potassium. An annual application of bone meal or general-purpose granular fertilizer in spring should provide a sufficient supply of nutrients for your plant beds. Be sure to keep fertilizer off leaves, flowers, and stems to avoid scorching. Plants need water to move the fertilizer nutrients to the roots. Without adequate water, the plant roots that do contact with the fertilizer may be burned, causing the roots to die and the plant to suffer. Always water your plants well before and after fertilizing to get the most benefit from the fertilizer.
“Miracle-Gro”, or equal, is recommended between root feedings and should be applied at the base of the plant or applied to the leaves, on a monthly basis.
Mulch Information
Organic mulches help suppress weed growth, retain moisture, and, as they are gradually incorporated into the ground, will maintain proper soil structure. Phase One Landscapes typically uses red cedar fiber mulch in perennial and shrub beds. Cedar is less prone to rapid decomposition than other wood, but it does degrade over time. You can have mulch installed by us, or you can have us deliver to you if you want to top-dress yourself.
It’s typical to top-dress mulch about once a year when the layer thins out or should weeds start to appear. A 1 to a 2-inch new layer of mulch spread evenly beneath the plants is sufficient. There is no need to remove old mulch first since decomposing of the old mulch helps add nutrients to the soil. As for rock mulch, there is no regular maintenance required.
In mulched beds, weeds will grow… especially in the first year, when new seeds are sprouting. Most of Colorado’s weeds are annual and if removed before the weed reseeds it will most likely not return the next year. Mulch will make weeding easier since sprouts have to work their way up through the layers. Spot spraying with an herbicide will kill weeds after they are growing. Phase One Landscapes has found Round-Up to be safe and effective. Take extreme care not to get any herbicide on the desirable plants, as it will kill them. Read and follow all product label instructions.
Improving Flowering Displays
Regular deadheading, or cutting off flowers after their prime, improves and extends many plants’ flowering display. The energy which would otherwise go into making seeds is then made available to the rest of the plant and can result in better foliage and a longer flowering period. Deadheading your garden improves the overall garden appearance, but is not vital to the survival of the perennial.
-
Hardscapes
Masonry
Concrete, flagstone, and brick are intrinsically very durable and will last for years, however, these materials are not maintenance-free. After we installed and cleaned your masonry patio or walk, we applied a sealer that repels moisture. It is a good idea to annually lightly powerwash the surface, and reseal the patio with a sealer. We recommend a penetrating sealer such as Siloxane, Saltgaurd, and Paver Enhancer.
Siloxane is a multipurpose sealer, Saltguard is a little better protection against the elements, and Paver Enhancer will provide a slight degree of sheen to the surface. You can purchase sealers at home improvement stores, Rio Grande Building materials, and some hardware stores. Phase One Landscapes can provide this service, just give us a call.
We recommend not using any type of ice or snowmelt on your stone, brick, or concrete surfaces. When applying fertilizers with iron, make sure any fertilizer that gets onto the hardscape is swept off before it gets wet, as iron will cause permanent stains.
Drylaid stone and brick are not as important to seal, as there is no grout in the joints, but it is a good idea to sweep some fine silica, or sandbox sand into the joints every year or two.
Carpentry – Wood Decks and Fences
Wood is a natural material that with proper care will also last for years. It must be understood that wood will continuously change with time. These continuous changes are part of wood's appeal, distinguishing it from stone, metal, and concrete. Wood inherently has checks and small cracks when delivered from the sawmill to the lumber yard. Wood has less dimensional stability than other building materials because it expands and contracts with temperature and moisture fluctuations. Understanding these aspects of woods’ personality will help you understand the challenges of keeping your wood structures looking good over the long haul.
The biggest enemy of wood is moisture or lack thereof. Colorado has a very dry climate, as well as, very strong ultraviolet light from the sun. Together these elements can warp, crack and shrink your wood. To protect your fences, decks, and other wood structures you should stain/seal your wood surfaces- horizontal surfaces should be stained/sealed every year or two, while vertical surfaces should be stained/sealed every two to five years. Remember, as with any natural product, variations in color and texture exist and may change over the course of time.
Superdeck, Behr, and Cabbott sealers and stains are preferred by us. We will normally use a Superdeck natural translucent sealer when we have installed your deck or wood structure.
There are a number of composite materials available for deck surfaces, and they are continually improving the colors and textures of the material. Trex, Fiberon, and Weatherbest are options if you are looking for this type of product.
Water Features Naturalistic
Your new naturalistic water feature is meant to look and feel like a waterfall and pond you might see in nature. The “Biofalls” system, which has been installed in your feature, is fairly self-sufficient and helps to keep your feature clean and healthy. Fish and water plants are recommended in these systems. The “Biofalls” system requires periodic applications of beneficial, or nitrifying bacteria, requiring oxygen to keep alive, meaning you should leave your system running continuously throughout the season.
Your feature may be emptied in the fall to prevent freeze damage, or in many cases left running year round with the possibility that a temporary heater may be necessary during extreme cold periods. If you keep your system running during the winter watch for ice dams that may cause the water to divert outside of the liner. If you have fish in the lower pond you will need to leave the water in the pond, and a small aerator should be installed to maintain oxygen levels and avoid ice forming over the entire area.
In spring when water temperatures rise above 50°, a new application of bacteria is required along with continued treatment as needed. The amount of attention the skimmer basket needs will vary, mostly due to falling leaves or high wind. The water level in your water feature will regularly lower due to evaporation and/or splash. If your feature has an auto-fill valve there is no need to fill manually as the irrigation system will automatically maintain the water level during the growing season. If your system does not have an auto-fill, just add water from a garden hose until the water level is approximately 1″ below the top of the skimmer opening.
Architectural Water Features
Essentially, architectural water features are very small swimming pools and are typically maintained with chemicals. Chlorine, Algicide (Physan 20), and/or UV filtration can help maintain water clarity. If your architectural water feature contains plants or fish, chlorine or Physan 20 should NOT be used. Other filtratrion/clarity systems may be included in your specific features such as an ozone generator, and sand filters. Refer to your specific manuals for care and maintenance tips, or call our office.
The water level in your water feature will regularly lower due to evaporation and/or splash. If your feature has an auto-fill valve there is no need to fill it manually as the irrigation system will automatically maintain the water level during the growing season. If your system does not have an auto-fill, just add water from a garden hose to the desired level. Architectural water features should be drained and left dry for the winter to avoid freezing and cracking the masonry.
-
Irrigation Systems
Irrigation systems provide convenient, efficient watering of your landscape. Your watering system is the single most important element in the maintenance of your investment. In our arid climate, it is critical to monitor the amount of water that is being used by your landscape, not only for the health of your investment but also to conserve this precious natural resource. Periodic inspections should be scheduled through us, or by yourself, to make adjustments for too little, or too much water in the landscape.
This section will familiarize you with the three basic components – the controller, or clock, the valves, and the spray heads. The controller tells the valves when to run, the valves open allowing water to get to the heads, and the heads apply the water to the landscape. Solutions will be outlined to deal with common problems.
Irrigation Controller
The brains of the system. This is an electronic timer that tells your valves when to turn on and how long to stay on. Programming is a matter of setting the time of day, and the days of the week for each zone to be watered. We have installed a clock with multiple programs. This allows you to “batch” the zones into different programs. Sod zones are usually on Program A, plant beds on program B, and drip zones on Program C.
Each program is set to water on specific days of the week, and the individual zones within the program are set for water duration times. This allows us to water the sod zones 3-4 days per week on Program A, and the bed zones 2-3 days per week on Program B. The other programs C and D can be used for custom scheduling of drip and annual pot watering zones.
The controller has a battery backup that will keep programming information, usually up to a week, in case of a power failure. Refer to your specific controller owner's manual for additional information.
Irrigation Valves
The valves are located in the valve box, which typically has a green or brown lid, level with the ground. Valves can be operated manually, if required, by turning the solenoid on top counterclockwise. There should be no water leakage from the valves when operated manually.
Unless there are special circumstances, all of our systems have a “master valve” installed. The master valve is located close to the Backflow Preventer. This valve opens each time a zone valve turns on, allowing water to flow to each of the other valves when the controller is cycling.
The benefits of a master valve are that it eliminates constant water pressure on each of the zone valves extending their lifespan, as well as it will “turn off” a zone valve that may be stuck in the open position. If you have one zone that comes on at the same time as the other zones, then shuts off at the end of all the cycles, then the valve is stuck open on the zone that runs with the other zones. If there was not a master valve installed, that open valve would continue to run until repaired.
Irrigation Heads
The spray heads for irrigation systems come in a variety of sizes and styles:
- Large radius “Rotor” heads that pop up and rotate. Typically these heads are used for 15′ to 30′ areas. They apply water at about half the rate as 4″ popup spray heads, and zones with these heads usually run about twice as long as the popup zones.
- Small radius “spray” heads that do not rotate covering areas up to 15′. A common use of pop-up spray heads would be 4″ pop-up for turf and 12″ pop-up for shrub/perennial beds. These types of heads have a filter under the nozzle which can get clogged, and there is the possibility that debris can get past the filter and clog the opening of the nozzle. Thankfully, the nozzle is relatively easy to remove, and cleaning rarely takes more than a toothpick and some dexterity.
- Drip irrigation is also utilized at the base of each plant. The idea behind drip irrigation is to conserve water by getting the water to the soil around the base of each plant. A special valve is installed, which reduces your water pressure and filters the water, which is then emitted at the base of each plant. Sometimes drip tubing is used that has emitters spaced about 12″ along the length of the pipe, which wet the soil in the planting bed. Drip systems conserve water, and are commonly used next to buildings to avoid water near the house. The primary disadvantage is that if an emitter is clogged, or moved from the plant, you can’t tell there is a problem until the plant appears stressed.
-
Low Voltage Lighting
Low voltage lighting accents your landscape, provides for safety, and security, and extends your enjoyment into the evenings. Path lights and up lights are the most commonly used light fixtures, but underwater lights will illuminate water features, and mini spotlights can accent a sculpture.
Low voltage light fixtures are wired into a transformer. This transformer, plugged into a 110V outlet, changes the electricity to 12 volts – similar to a car battery’s output. This low voltage is safe, and will not hurt anyone who cuts through a wire, or during any maintenance procedure.
If your lights are not working properly, go through the following checklist to see if you can pinpoint the source of the problem.
1. Check the power at the outlet, if you don’t have a tester, use a hair dryer or other small appliance. If there is no power to the outlet check your GFCI buttons on the outlet. Make sure your transformer is properly plugged in.
2. Check to see if the light bulb(s) needs to be replaced.
3. Check the timer or the on-off switch in the transformer. Power outages can change the time on the time dial.
4. If your system uses a photocell to turn it on or off, check to make sure the photocell is working by placing tape over it during daylight hours. (the timer will need to be in the on position also) If the system is working properly, the lights should turn on.
5. If your overload protection trips, you may have a loose connection at the transformer terminals – tighten with a screwdriver. There may be a broken wire somewhere in the system. Broken wires can occur when digging around in plant beds with sharp tools.
6. If none of these tests seem to solve your problem it is best to call us and let us check the system for you. Your landscape lighting can be easy to maintain by simply keeping the lamps and photocells clean, regularly checking the light bulbs, and making certain there is no moisture in the fixture socket.
Local Vendors
True-Pump 1429 S Broadway, Denver
Offer: Pond & Pump supplies 303-744-3505
Web: www.truepump.com
Western Outdoor Aquatics 16150 Hwy. 7 Brighton
Offer: Pond & Pump supplies 800-651-2559
Web: www.westernpond.com (great Koi pond behind office)
Big Tool Box 8080 S. Holly Street 303-779-8822
Offer: Irrigation, Landscape, Hardware
Light Bulb Supply 2010 Delgany St. Denver (behind Coors field)
Offer: All kinds of bulbs 303-295-1080
Birdsall & Co. 1540 S. Broadway, Denver
Offer: Home & Garden 303-722-2535
Additional services offered by Phase One Landscapes:
- Clean and re-sealing of stone and brick patios, as well as wood structures
- Top dressing of mulch beds
- Water feature cleaning
- Irrigation service
- Drainage solutions
- Annual color installation and maintenance
- Snow removal
-
Warranty Program
Phase One Landscapes will cover, for one year after the last date of installation, all of our workmanship,* along with trees (non-spaded), shrubs, perennials, and ground cover. We offer one replacement for every individual tree, shrub, perennial, and groundcover that dies, or is in poor condition. Of course, we can only guarantee those plants installed by Phase One Landscapes, and transplanted material is not guaranteed.
*workmanship coverage is at the discretion of Phase One Landscapes after reviewing the workmanship in question with the owner and the appropriate parties.
30-Day Customer Satisfaction Policy: This policy is designed to cover problems that might arise immediately after installation (up to 30 days). Here’s how it works: Phase One Landscapes will replace any plant if it dies within the first 30 days of installation. This means you’re guaranteed one replacement of the same plant, in the same season.
Replacement plantings during this period are not warrantied for a second time but don’t worry, our 30-day policy doesn’t affect your year-long warranty coverage of all plants. It simply guarantees an immediate replacement so your newly installed garden looks perfect from the get-go.
Irrigation Warranty
The Irrigation system has a one-year warranty on parts and labor. Any freeze damage will only be covered if Phase One Landscapes was contracted to provide winterization of the system.
Concrete Warranty
There is a limited one-year warranty for workmanship and material beginning on the date of substantial completion. Please note that hairline or other random non-structural cracking is not a cause for replacement.
Carpentry Warranty
Wood as a natural product will have some degree of checking & splitting. This natural occurrence is not a cause for replacement.
Mortared Flagstone
Flagstone as a natural product will have some degree of spalling or cracking. This natural occurrence is not a cause for replacement. Your stone and concrete are sealed with a penetrating sealer as during the initial installation. It is recommended to reseal your masonry annually. Chemicals such as salt and deicers will damage masonry and concrete surfaces – we recommend avoiding using these products.
Exclusions:
- Inadequate or improper maintenance. This includes over-watering, neglect by the owner, or abuse or damage by others.
- Labor to resolve manufacturer defects and/or labor to repair/replace materials under manufacturer warranty.
Phase One Landscapes warranties are void if the construction contract payments are not received from the client when due.
Keep Your Investment Healthy With Maintenance & Care
Home and business owners can engage us for any or all of the following services to keep their landscapes thriving. Our landscape professionals use only the best organic products when caring for your lawn and garden.
We offer a variety of seasonal and year-round maintenance services for both commercial and residential landscapes in the Denver area.
Our clients all have different needs – contact us and we will discuss what services work best for you and we will create a proposal specifically for you.
Maintaining a Healthy Lawn and Garden
Our standard maintenance agreement will include:
- Spring and fall sprinkler service
- Thorough spring and fall leaf and debris cleanup of the property
- Mowing, fertilizing, and spring and fall aeration, weed control, and edging
- Plant bed care including weeding, trimming, deadheading, and fertilization
- Pruning of shrubs and small trees
- Clean up hardscape areas including patios, paths, and driveways
- Maintenance of natural and architectural water features
Special Projects and Enhancements
- Power wash and sealing of stone, brick, and concrete
- Landscape lighting installation, service, and repair
- Annual bedding plantings and pots – design and planting
- Tree and shrub plantings – design, installation, and warranty
- Topdressing of wood mulch planting beds
Winter Projects
- Snow removal – hand shoveling
- ATV or truck plowing
- Bobcat services
- Winter watering and pruning of plant material
30+ Years of Experience
Licensed and Insured
Learn More About
Phase One Landscapes


SERVING
CONTACT US
HOURS
BUSINESS HOURS
Mon - Fri: 8:00 am - 5:00 pm
Sat: By Appointment
Sun: closed